
Ceramic pans are a great option for making all kinds of foods. But if you have a brand new one, seasoning it first can help protect it and make your food taste better! Here’s how to season a ceramic pan in a few, easy-to-follow steps.

Few things are as exciting as getting some shiny new cookware! Ok, I may be on an island here, but I think it’s exciting. And it can be tempting to start using it right away.
But when it comes to a new pan, I always season it first. It can help protect it for long-term use, keep food from sticking, and even improve the flavor of the food you make in it.
And it’s easier than you may think! In this easy-to-follow guide, I’ll go over each step of the process so you can season your ceramic pans with confidence.
Jump to:
Why season ceramic pans?
Do you have a favorite pan or piece of cookware? It just seems to make food better, right? And chances are, you want it to last as long as possible.
The seasoning process does just that. It helps form a protective layer on the surface of your pan so it can last longer without suffering damage or burn marks. Plus, it can help keep food from sticking to the pan, which can also extend its shelf life and make cleaning it easier.
That’s especially true for ceramic cookware, which doesn’t come with a non-stick coating and can scratch more easily than other types of pans, like those coated with Teflon.
How to season a ceramic pan: Step-by-step guide
This guide walks you through the seasoning process in a simple, easy format. And feel free to save this page so you can repeat it over time, as the coating can wear off the more you use your pan.
Step 1 – Thoroughly clean your ceramic pan
As with pretty much every new piece of kitchen equipment, it’s always a good idea to wash it well before you use it the first time. This will remove any dust or dirt from the packaging. Plus, you want a spotless pan surface in order to make the seasoning process as effective as possible.
To clean it, just use warm water and regular dish soap, along with a soft cloth. Then dry it completely with a clean paper towel or by simply letting it dry on a dish rack.
❌ Avoid using steel wool or a rough sponge or brush to clean your ceramic frying pan, as those can cause scratches.
Step 2 – Oil the surface of your pan
Once your pan is clean, grab some cooking oil to coat the pan with.

As part of the seasoning process, you’ll be heating the pan for up to an hour. So it’s a good idea to use an oil with a high smoke point that can withstand heat for longer periods of time. Good options include canola oil, sunflower oil, avocado oil, and grapeseed oil. But you can also regular vegetable oil if that’s what you have on hand.
💡 Tip: If you use olive oil, skip the extra virgin olive oil and opt for light olive oil instead as it has a higher smoke point.
🥄 Next, add one tablespoon of oil to your ceramic pan and coat it evenly with a paper towel or soft cloth. If you have a large pan, feel free to use more oil. You may need less oil for smaller ones. You should end up with a thin layer of oil over the entire surface of the ceramic pan. Wipe up any excess.

Step 3 – Warm up the ceramic pan
To create and set the protective layer in your pan, you need to heat up the oil. And you have a couple of options. You can simply do it on the stovetop or you can place the pan in the oven.
Using the stovetop
To season your pan on the stovetop, place it over low to medium heat and allow the oil to heat up gradually. Don’t rush it as that can fail to build an effective, lasting coating.
After about 15-30 minutes, the oil should start to smoke. Once that happens, turn off the heat and let the pan rest.
Using the oven

You can also use the oven to heat up your pan. It’s equally as effective as the stovetop, but it can take a bit longer.
First, set the oven temperature to 300-325 degrees Fahrenheit, or about 150°-160° C, and put your pan in the center of the middle rack. You don’t want it too close to the top heating element so it doesn’t heat up too quickly.
Once you see it start to smoke, remove it from the oven and place it on a safe even surface to cool.
✅ Note: Be sure to check your ceramic pan or the packaging to make it’s oven safe.
Step 4 – Allow the pan to cool
After you remove your pan from the heat, you want to let it cool down completely at room temperature. During this step, the oil coating will complete setting.
Don’t try to speed up the cooling process by placing it in the fridge or running it under cold water. That can affect the coating and make it less effective. Plus, big temperature swings can damage the pan’s surface.
Step 5 – Check the oil coating
After your ceramic pan has fully cooled, inspect the oil coating to make sure it has completely and evenly covered the surface of your pan. If you see any bare spots, simply repeat the seasoning process.
If all looks good, gently wipe away any excess oil with a cloth or towel. Don’t overdo it or you can accidentally remove the protective coating you just added. When you’re done, your ceramic pan should have a shiny, oily sheen on the surface. That’s it!
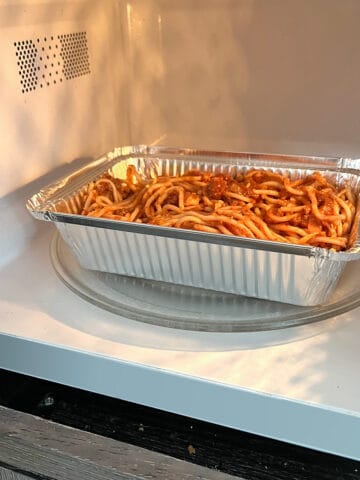
👉🏼 Related: Can you microwave aluminum trays?
How to care for your ceramic pans

Now that you’ve seasoned your ceramic pans, there are some other things you can do to help them last longer.
Clean them well
One secret to extending the shelf life of the seasoning process is to clean the pans properly after each use. You don’t want to leave any excess, used cooking oil or food stuck to the pan.
Simply use warm water, mild dish soap, and a soft sponge, towel, or dish brush to wash your pans. If there is food stuck to them, allow them to soak in soapy water for a bit, then wash them and let them dry fully before storing.
Don’t put them in the dishwasher
Dishwasher detergents can contain harsh chemicals which can affect the cooking surface of your ceramic pans. And the high temperatures in dishwashers can affect your pan’s protective seasoning. And you run the risk of the pan crashing into other items in the dishwasher, would could lead to damage. So the bottom line: your best option is to wash your ceramic pans by hand.
Skip the metal utensils
Be careful when using metal forks or tongs while cooking with your ceramic pans. They can scratch the ceramic coating and otherwise damage them, reducing their nonstick properties. The same goes for metal spatulas.
Instead, use tongs that include silicone coatings, silicone spatulas, or wooden spoons.
Store carefully
Since ceramic pans can scratch easily, it’s a good idea to store them separately. Don’t stack them on top of each other or on other pans. If you have kitchen drawers with separate pan sections, use them to protect your pans. Or you can hang them on hooks from their handles.
If neither of those is an option and you need to stack them, you can simply place a soft dish towel between your pans to help prevent nicks and dings.
FAQ
The coating created by seasoning a pan will wear off over time. So it’s a good idea to season your ceramic pans every couple of months. If you start to notice food sticking to your pan more frequently, or it starts to lose its smooth, shiny surface, those are signs it’s due for another seasoning.
More cooking equipment answers
Get more answers to your questions about kitchen equipment. Check out these posts.

Leave a Reply